
Dreaming of fresh honey from your own backyard? Backyard beekeeping is a fun, rewarding hobby that helps bees and the planet. It’s easier than you think to start your own hive! In this guide, I’ll walk you through the steps to become a beginner beekeeper. You’ll learn what you need, how to set up, and tips to keep your bees buzzing happily. Let’s get started!

Why Start Backyard Beekeeping?
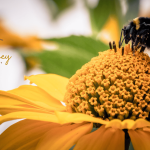
Bees are amazing creatures. They pollinate plants, help gardens grow, and produce delicious honey. Backyard beekeeping lets you support these vital pollinators while enjoying fresh honey. It’s also a great way to connect with nature and learn a new skill.
Benefits of Beekeeping
Here’s why beekeeping is worth trying
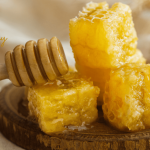
- Fresh honey: Nothing beats homegrown, raw honey.
- Helps the environment: Bees boost pollination for plants and crops.
- Fun hobby: It’s relaxing and educational for all ages.
- Community impact: Your bees help local gardens and farms.
- Sustainable living: Beekeeping promotes eco-friendly habits.
I started my hive last year, and harvesting my first jar of honey felt like magic!
Is Beekeeping Right for You?
Beekeeping is rewarding but takes commitment. You’ll need time, space, and a love for learning. It’s not hard, but it requires care and patience. Before starting, check if you’re ready:
- Space: A small backyard or patio works fine.
- Time: Plan for 10-20 hours a year for hive care.
- Local laws: Check zoning rules or HOA regulations.
- Allergies: Ensure you’re not allergic to bee stings.

Step-by-Step Guide to Starting Your Hive
Ready to become a beekeeper? Follow these steps to set up your first hive. It’s simpler than it sounds!
Step 1: Learn About Beekeeping
Knowledge is key. Read books, watch videos, or take a local beekeeping class. Join a beekeeping club to connect with experienced beekeepers. They can share tips and answer questions.
- Resources:
- Books like “The Beekeeper’s Handbook” by Diana Sammataro.
- Online courses from sites like Beekeeping 101.
- Local beekeeping associations for hands-on advice.
I joined a local club, and the members helped me avoid beginner mistakes!
Step 2: Choose the Right Equipment
You’ll need some basic gear to start. Most items are affordable and available from beekeeping suppliers. Here’s what you’ll need:
- Beehive: A Langstroth hive is beginner-friendly. It includes frames, boxes, and a cover.
- Protective gear: A bee suit, gloves, and veil keep you safe.
- Smoker: Calms bees during hive checks.
- Hive tool: Helps open and inspect the hive.
- Feeder: Provides sugar syrup when nectar is scarce.
- Bees: Order a “package” of bees or a “nuc” (small colony).
You can find starter kits online for $150-$300. My kit came with everything I needed to begin.
Step 3: Pick a Hive Location
Choose a spot that’s safe for bees and people. Bees need a sunny, sheltered area with access to flowers. Here’s what to look for:
- Sunlight: Morning sun helps bees start their day.
- Shelter: Protect from strong winds and heavy rain.
- Water source: A shallow dish with pebbles works great.
- Space: Keep hives 10 feet from property lines or walkways.
- Flowers nearby: Plant bee-friendly flowers like lavender or clover.
I set my hive in a sunny corner of my yard near a wildflower patch. The bees love it!
Step 4: Get Your Bees
You can buy bees in spring, the best time to start. There are two main options:
- Package bees: A box of 10,000 bees with a queen (about $100-$150).
- Nucleus colony (nuc): A mini-hive with frames and a queen (about $150-$200).
Order from a reputable supplier and check delivery dates. My first nuc arrived in April, and the bees settled in quickly.
Step 5: Set Up the Hive
Once your bees arrive, it’s time to set up. Follow these steps:
- Assemble the hive: Stack the bottom board, hive body, and frames. Add the inner and outer covers.
- Install the bees: Gently shake package bees into the hive or transfer nuc frames.
- Feed the bees: Fill the feeder with 1:1 sugar syrup to help them settle.
- Close the hive: Let the bees adjust for a few days before checking.
I was nervous at first, but watching the bees move in was so exciting!
Step 6: Care for Your Bees
Bees need regular care, but it’s not overwhelming. Check the hive every 1-2 weeks in spring and summer. Here’s what to do
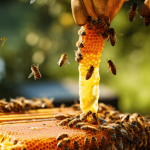
- Inspect the hive: Look for eggs, larvae, and honey stores.
- Check the queen: Ensure she’s laying eggs (a sign of a healthy hive).
- Feed if needed: Provide sugar syrup during low nectar seasons.
- Watch for pests: Look for mites or beetles and treat naturally if possible.
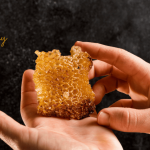
- Harvest honey: Only take extra honey in late summer, leaving enough for the bees.
I check my hive every two weeks, and it’s like visiting old friends!
Tips for Beginner Beekeepers
Want to succeed? Follow these tips
- Start small: One or two hives are plenty for beginners.
- Be patient: Bees take time to build a strong colony.
- Use a smoker: It calms bees and makes inspections easier.
- Keep records: Note hive checks to track progress.
- Ask for help: Local beekeepers love sharing advice.
Common Mistakes to Avoid
Avoid these beginner pitfalls
- Checking too often: Disturbing the hive stresses bees.
- Taking too much honey: Leave enough for the bees to survive winter.
- Ignoring pests: Mites can destroy a hive if untreated.
- Skipping protection: Always wear a suit to avoid stings.
I once forgot my gloves and got a sting. Lesson learned—gear up!
Costs of Backyard Beekeeping
Beekeeping is affordable but has startup costs. Here’s a breakdown
- Hive and equipment: $150-$300 for a starter kit.
- Bees: $100-$200 for a package or nuc.
- Protective gear: $50-$100 for a suit and gloves.
- Ongoing costs: $20-$50/year for sugar syrup or treatments.
Total first-year cost is about $300-$500. Compare that to store-bought honey at $10-$15 per jar—it pays off fast!
Benefits Beyond Honey
Beekeeping does more than produce honey. Your hive will.
- Boost your garden: Bees pollinate flowers and veggies.
- Support local ecosystems: They help nearby plants and crops.
- Teach patience: You’ll learn to work on the bees’ schedule.
- Connect you with nature: It’s a calming, grounding hobby.
My tomatoes and zucchini went wild after I started beekeeping!
Safety and Precautions
Beekeeping is safe with care, but keep these in mind
- Allergies: Test for bee sting allergies before starting.
- Kids under 1: Avoid giving raw honey due to botulism risk.
- Sting protection: Wear a suit and stay calm around bees.
- Local laws: Check if beekeeping is allowed in your area.
Frequently Asked Questions
How much time does beekeeping take?
About 10-20 hours a year for one hive. Most work is in spring and summer.
Do I need a big yard?
No! A small backyard or even a rooftop works fine.
Can I keep bees in a city?
Yes, but check local regulations. Many cities allow urban beekeeping.
Where can I buy beekeeping supplies?
Check local farm stores, online retailers like Amazon, or beekeeping suppliers like Mann Lake.
Final Thoughts
Backyard beekeeping is a fun, eco-friendly way to enjoy fresh honey and help the planet. With a little learning and the right gear, anyone can start a hive. Your bees will reward you with honey, better gardens, and a new love for nature. Take the first step and join the beekeeping community!
Have you thought about beekeeping? Share your questions or plans in the comments. Happy buzzing!
For more information, visit , https://besthoneytobuy.com/