
Want a natural way to boost your immune system? Fermented garlic honey is a simple, powerful remedy you can make at home. It’s easy, affordable, and packed with health benefits. In this post, I’ll share a step-by-step recipe, tips for success, and why this combo is a wellness game-changer. Let’s get started!

What is Fermented Garlic Honey?
Fermented garlic honey is raw honey infused with garlic cloves through fermentation. The process enhances the health benefits of both ingredients. It’s a traditional remedy used for centuries to fight colds, boost immunity, and support overall health. Plus, it’s super easy to make!
Why Raw Honey?
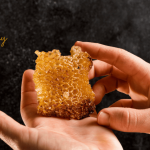
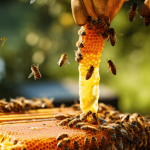
Raw honey is unprocessed and straight from the hive. It’s rich in antioxidants, enzymes, and antibacterial properties. Unlike regular honey, it’s not heated or filtered, so it keeps all its natural goodness. It’s perfect for fermentation because it contains natural yeasts.
Why Garlic?
Garlic is a powerhouse ingredient. It’s loaded with allicin, a compound with antiviral and antibacterial properties. Garlic can help fight infections, reduce inflammation, and support heart health. When fermented, it becomes milder and easier to eat.
Benefits of Fermented Garlic Honey
This remedy is a superstar for your health. Here’s why:
- Boosts immunity: Garlic and honey fight off colds and flu.
- Antibacterial power: Both ingredients kill harmful bacteria.
- Soothes sore throats: Honey coats and calms irritation.
- Supports digestion: Fermentation adds gut-friendly probiotics.
- Anti-inflammatory: Reduces swelling and body aches.
Ready to make your own? Let’s dive into the recipe!

Ingredients for Fermented Garlic Honey
You only need two ingredients. Yes, it’s that simple! Here’s what you’ll need:
- 1 cup raw honey: Choose organic, unfiltered honey for best results.
- 8-10 garlic cloves: Fresh, plump cloves work best.
Choosing the Right Ingredients
Quality matters. Buy raw honey from a local beekeeper or a trusted brand. Look for “raw” and “unfiltered” on the label. For garlic, choose fresh bulbs with tight, unblemished skins. Avoid sprouted or soft cloves.
Tools You’ll Need
No fancy equipment required. Gather these basics:
- A clean glass jar (8-12 oz) with a tight lid
- A knife or garlic peeler
- A cutting board
- A spoon or small spatula
Step-by-Step Recipe for Fermented Garlic Honey
This recipe makes about one small jar. It takes just 10 minutes to prep, then nature does the rest. Follow these steps for success.
Step 1: Prepare the Garlic
Peel 8-10 garlic cloves. Gently crush each clove with the flat side of a knife. This releases the juices and helps fermentation. Don’t chop them—just a light smash will do. Place the cloves in the clean glass jar.
Step 2: Add the Raw Honey
Pour raw honey over the garlic cloves. Make sure the cloves are fully submerged. Leave about half an inch of space at the top of the jar. The honey should cover the garlic completely to prevent mold.
Step 3: Seal and Store
Close the jar with a tight lid. Give it a gentle shake to mix the honey and garlic. Place the jar in a cool, dark spot, like a pantry or cupboard. Avoid direct sunlight, as it can slow fermentation.
Step 4: Burp the Jar
Fermentation creates gases, so “burp” the jar daily. Open the lid briefly to release pressure, then close it again. Flip the jar upside down every day to keep the garlic coated in honey. You’ll see bubbles forming after a few days—that’s a good sign!
Step 5: Let It Ferment
Let the mixture ferment for 2-4 weeks. The flavor will mellow over time, and the garlic will soften. Taste it after two weeks to check if it’s ready. It’s done when the honey is runny and the garlic tastes less sharp.
How to Use Fermented Garlic Honey
Once fermented, this remedy is versatile. Here are some ways to use it:
- Daily boost: Take 1 teaspoon daily to support immunity.
- Cold remedy: Eat 1-2 cloves with honey at the first sign of a cold.
- Sore throat relief: Swallow a spoonful to soothe irritation.
- Cooking: Drizzle over toast or add to salad dressings for a tangy kick.
- Gift idea: Share small jars with friends or family.
I keep a jar in my fridge and take a spoonful whenever I feel under the weather. It’s a lifesaver during flu season!
Why Fermented Garlic Honey Works
Fermentation makes this remedy extra powerful. The process creates probiotics, which support gut health. Garlic’s allicin and honey’s enzymes work together to fight bacteria and viruses. Plus, fermentation softens the garlic’s bite, making it easier to eat.
Compared to over-the-counter remedies, this is all-natural and budget-friendly. A jar costs about $5 to make, while store-bought immune boosters can run $20 or more.
Tips for Success
Want perfect fermented garlic honey? Follow these tips
- Use clean tools: Sterilize your jar and utensils to avoid contamination.
- Check for bubbles: Bubbles mean fermentation is happening.
- Be patient: Fermentation takes time, so don’t rush it.
- Store properly: Keep it in the fridge after fermentation to slow the process.
- Label the jar: Write the start date so you know when it’s ready.
Common Mistakes to Avoid
It’s easy to mess up if you’re new to fermentation. Here’s what to watch out for
- Using processed honey: Only raw honey ferments properly.
- Not submerging garlic: Exposed cloves can grow mold.
- Skipping burping: Trapped gases can cause the jar to leak or crack.
- Using old garlic: Fresh cloves ensure the best flavor and benefits.
Storing Your Fermented Garlic Honey
Once fermented, store the jar in the fridge. It can last up to a year, but it’s best used within 3-6 months. The cold slows fermentation but keeps the benefits intact. Always use a clean spoon to avoid introducing bacteria.
Safety and Precautions
This remedy is safe for most people, but take care
- Allergies: Check for honey or garlic allergies before trying.
- Botulism risk: Use raw honey and keep garlic submerged to prevent issues.
- Kids under 1: Don’t give raw honey to infants due to botulism risk.
- Consult a doctor: If you have health conditions, check with a professional.
I once forgot to submerge a clove, and it turned fuzzy. Now I double-check to make sure everything’s covered!
Customizing Your Recipe
You can tweak this recipe to suit your taste. Here are some ideas
- Add herbs: Try a sprig of rosemary or thyme for extra flavor.
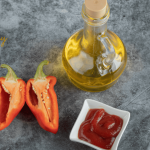
- Spice it up: Add a small chili pepper for a spicy kick.
- Mix with ginger: Grate fresh ginger for added immune support.
- Use different honey: Try clover or manuka for unique flavors.
Manuka honey is pricier but has extra antibacterial power. I’ve tried it, and the results are amazing!
Frequently Asked Questions
How do I know it’s fermenting?
Look for small bubbles in the honey. The texture will get runnier over time.
Can I eat the garlic cloves?
Yes! They’re soft, mild, and delicious after fermentation.
How long does it take to ferment?
Usually 2-4 weeks. Taste it after two weeks to check the flavor.
Where can I buy raw honey?
Local farmers’ markets, health food stores, or online retailers like Amazon have great options.
Why Make Your Own Fermented Garlic Honey?
Store-bought remedies are expensive and often full of additives. This DIY version is natural, effective, and costs pennies per dose. Plus, it’s fun to make! You’ll feel like a wellness pro watching those bubbles form.
Final Thoughts
Fermented garlic honey is a simple way to boost your health naturally.
It’s easy to make, tastes great, and works wonders for immunity. Whether you’re fighting a cold or just want to stay healthy, this remedy is a must-have.
Try it out and see how it fits into your routine. Have you made fermented foods before? Share your tips or questions below. Happy fermenting!
For more information, visit , https://besthoneytobuy.com/